| Enrico Rossi Condensed Matter Theory Group Home Group Publications CM seminars Briefcase |  |
|---|
Physics Briefcase
This is a growing list of Physics demonstrations designed to introduce physics concepts. Most of the demonstrations are suitable for a wide audience: K-12 students, college students, and the general public. The demonstrations are designed to be portable: a set of demonstrations from the list should easily fit in the trunk of the average car. In addition, most demonstrations are designed so that when done in a class environment the students should be able to set up and perform the demonstrations themselves with guidance from the instructor.
For each demonstration we provide a table that summarizes in a compact form the key facts about the demonstration. The meaning of each entry is explained below.
In addition to the information available here, a very helpful resource is the website WM-demos with the list (still incomplete) of the demos available in the Physics department at William & Mary, and the University of Virginia demolab.
| Entry | Meaning |
|---|---|
| Level | Level (K, 1st grade,.., College) at which the Demonstration can be executed safely and be enjoyable for the audience. |
| Conceptual Level | Level (K, 1st grade,.., College) at which the concepts underlying the demonstration can be conveyed to the audience. This is mostly relevant when using the demonstrations in a classroom environment. |
| Warnings | Possible hazards related to setting up, carrying out, the demonstration. |
| Subject | General physics area relevant for the demonstration. |
| Key concepts | Key ideas, laws, principles, the demonstration aims to illustrate. |
| Participatory level | We classify the demonstrations in two groups: Instructor-Participants, Instructor-only. Instructor-Participants demonstrations are ones for which multiple stations can be set up easily to allow the participants to execute the demonstration along the instructor. Instructor-only demonstrations are ones that for safety, cost, or complexity should be performed only by the instructor |
| Setup time | Time to set up the demonstration |
| Total time | Time required to set up and perform the demonstration |
| Difficulty | Difficulty level from 1 to 5 (1 very easy, 5 very difficult) to setup and carry out successfully the demonstration. |
| Materials | List of necessary materials. |
| Note | Recommendations, tips. |
| Cost | Estimated cost per station (2016 dollars). In most cases some of the materials can be reused reducing the total cost. |
List of Demonstrations
- Levitating graphite
- Electric motor
- Levitron
- Bending light with water
- Floating needle
- Non-Newtonian fluid
- Soap driven boats
- Tippe top
Levitating graphite
| Key facts | |
|---|---|
| Level | 1st Grade and up |
| Conceptual Level | 6th Grade and up |
| Warnings | Strong small magnets |
| Subject | Condensed matter physics |
| Key concepts | Diamagnetism |
| Participatory level | Instructor-Only |
| Setup time | 5 minutes |
| Total time | 10 minutes |
| Difficulty | 1 |
| Materials | Graphite levitation kit |
| Note | The graphite flakes are very fragile and thin and so they should handled and transported carefully. |
| Cost | $15 |
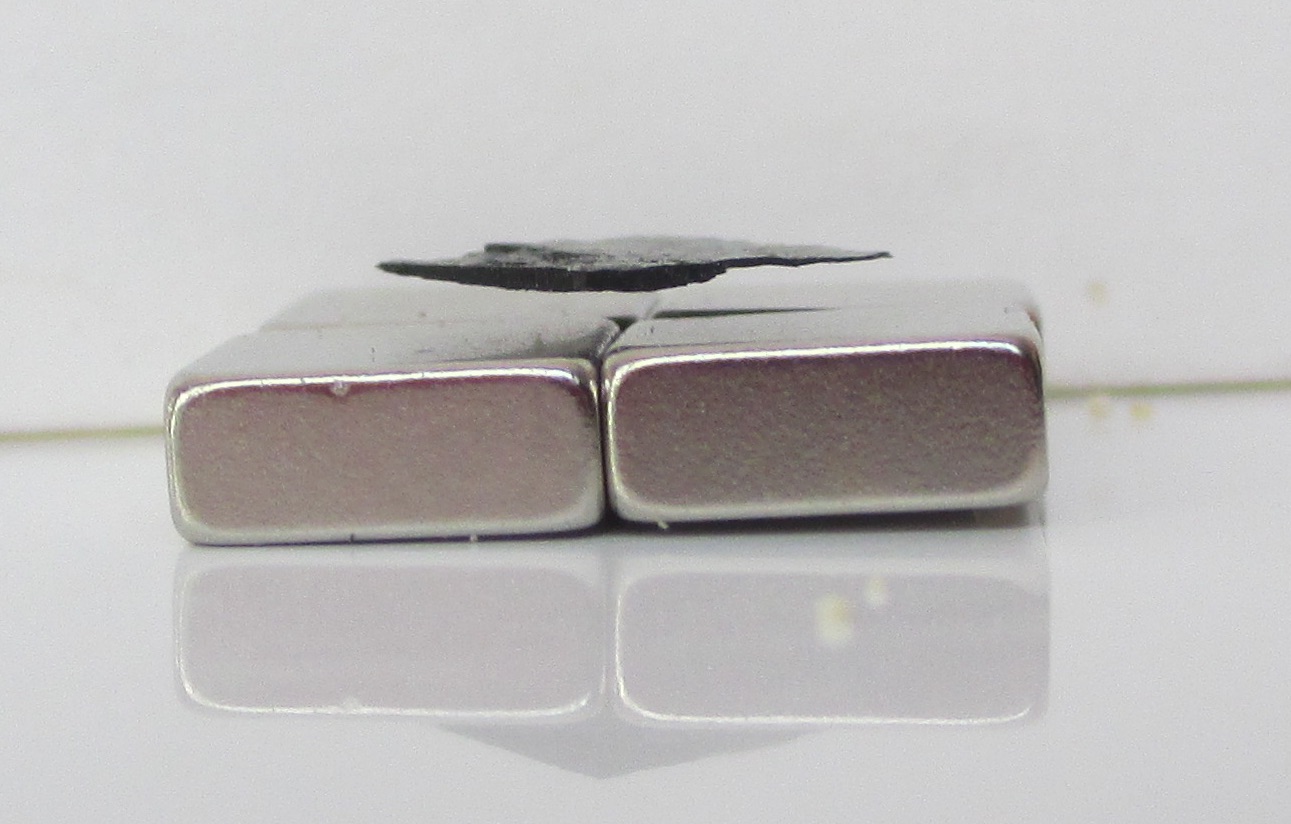
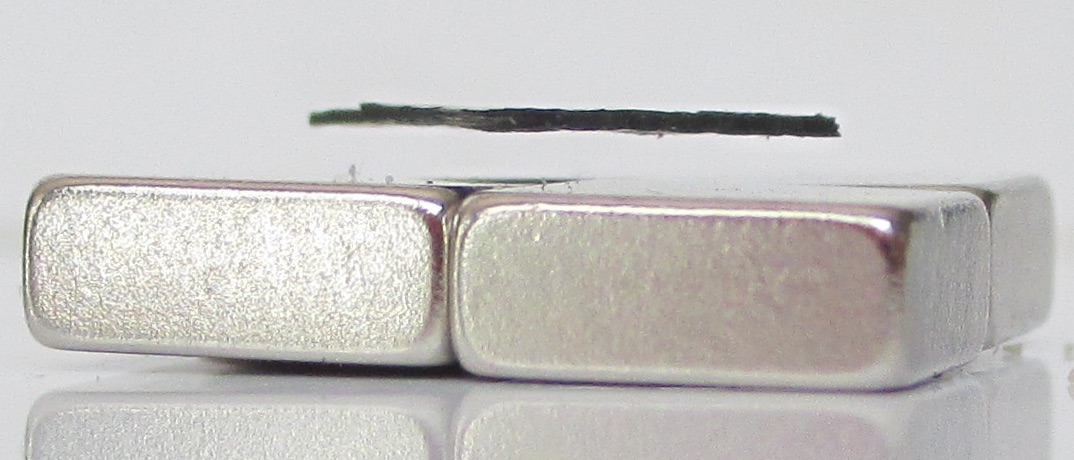
This demonstration is intended to introduce the concept of diamagnetism, i.e. the property of some materials to have the tendency repel external magnetic fields. The demonstration is quite entertaining and should be engaging for students of all grades. However, the concept of diamagnetism requires some background in magnetism to be fully appreciated. In addition, care should be taken in preventing young students from mishandling the small powerful magnets.
The kit provides four small magnets that should be arranged in a planar form as shown in the figure. In the kit there are few flakes of pyrolytic graphite. In the demonstration we carefully place one of the graphite flakes above the magnets. The magnetic field created by the magnets induces the electrons in the graphite to modify their orbitals, such modification of the orbitals creates a magnetic field that opposes the one due to the external magnets. Because the graphite flake is very light, the repulsive force due to the opposite magnetic fields (the one created by the magnets and the one created by the electrons in the graphite) is strong enough to compensate the gravitational force and make the graphite flake levitate.
This demonstration pairs well with other demonstrations on magnetism and the magnetic properties of materials, such as the Levitron, and the Meissner effect in superconductors.
It is interesting to notice that one can show that no levitation can be obtained using any combination of fixed magnets and electric charges. This a theorem that has been proved in 1842 by Earnshaw, W. Earnshaw, "On the nature of the molecular forces that regulate the constitution of the luminferous ether", Trans. Camb. Phil. Soc., 7, 97-112 (1842), Earnshaw's theorem, (on Magnetic Levitation). Earnshaw's theorem does not apply when one considers diamagnetic materials, as in this demonstration. Superconductors are ideal diamagnets. In addition, Earnshaw's theorem does not apply when the magnets are not fixed, a fact that is exploited in the Levitron demonstration, see below.
Electric motor
| Key facts | |
|---|---|
| Level | 3rd Grade and up |
| Conceptual Level | 5th Grade and up |
| Warnings | Very strong magnets, they can pinch skin and damage electronics and credi cards. Handle with care and keep away from electronics and magnetic storage devices. |
| Subject | Electromagnetism |
| Key concepts | Faraday's law, Lorentz force. |
| Participatory level | Instructor-Participants |
| Setup time | 20 minutes |
| Total time | 30 minutes |
| Difficulty | 3 |
| Materials | 22 gauge copper wire, 1 battery AA or D, Neodymium N52 magnet, electric tape, permanent marker, paper clips. It might useful to have a pair of pliers to pass around. |
| Note | Handle with care the magnets. |
| Cost | $6 |
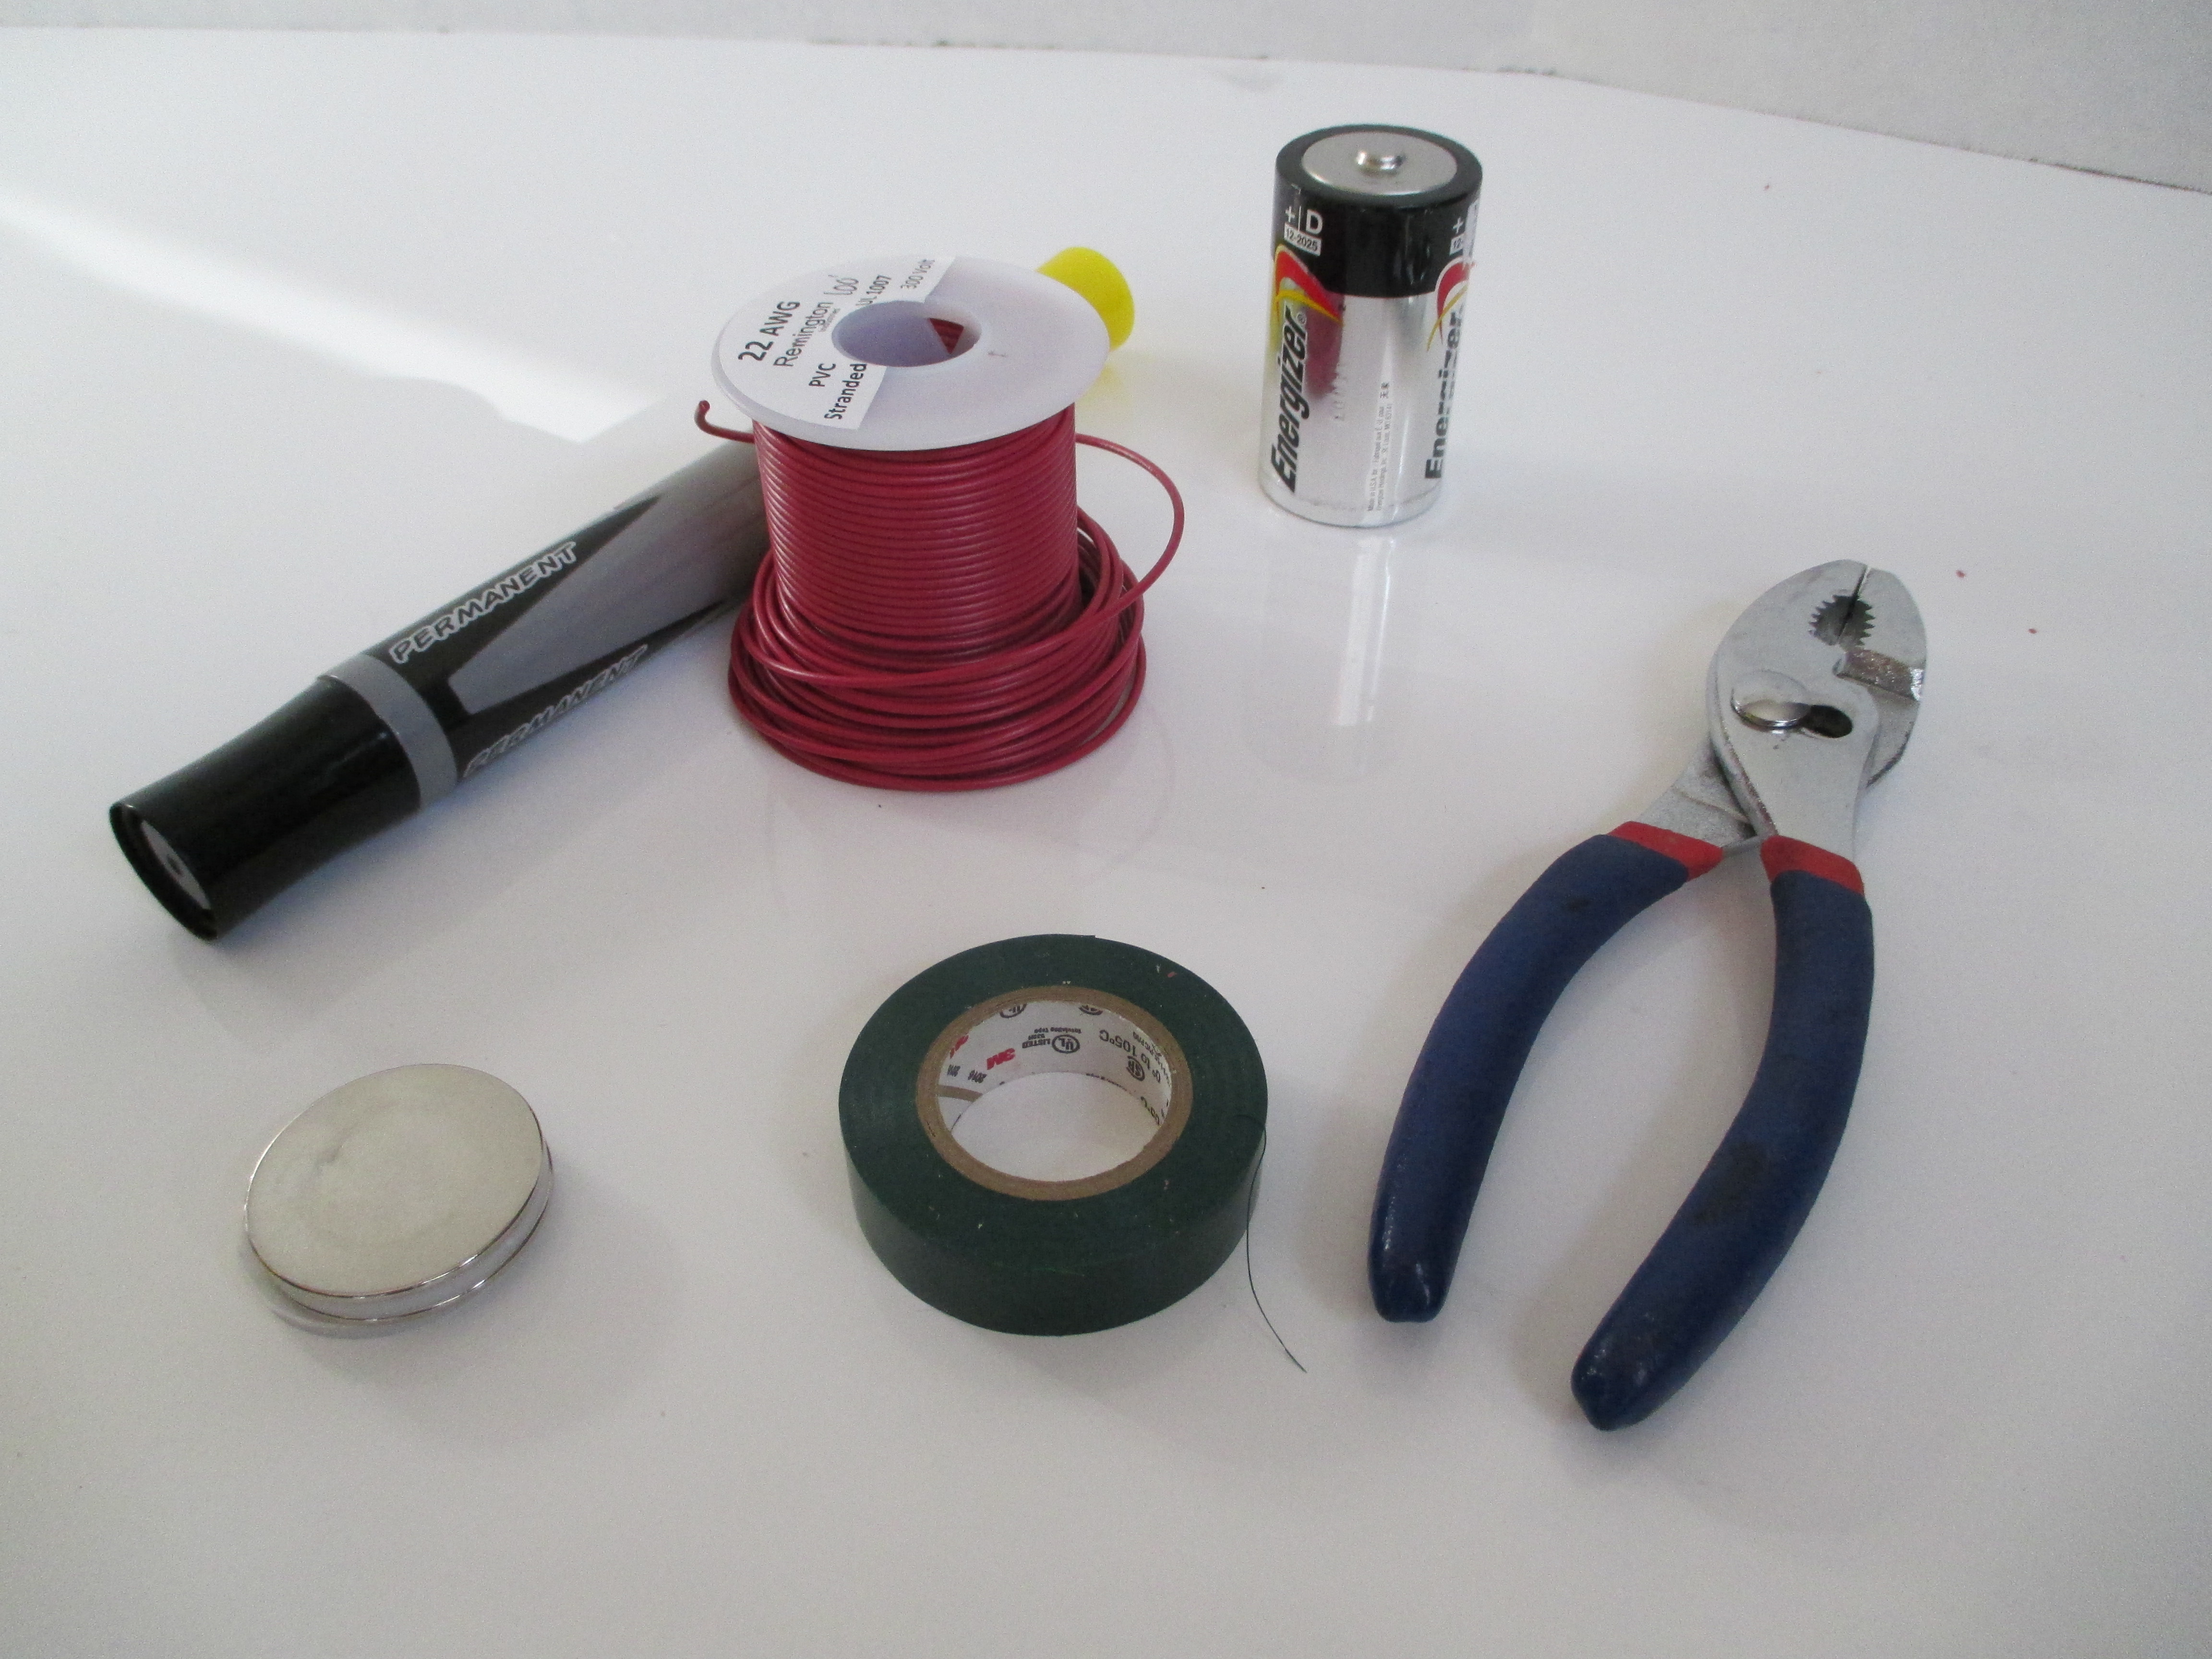
By building a simple dc electric motor the demonstration aims to show the principles of electromagnetism in action. In particular it offers the opportunity to introduce/review Faraday's law and Lorentz force.
The first step is to create a coil by winding the copper wire around the battery few times. The number of windings can vary and it is something that the students are encouraged to experiment with. Sections of wire should be left at the two ends of the coil, these sections will form the axles of the motor. The coil-axles assembly should be well-balanced, i.e. the axles should be extending as close as possible from the middle of the coil. Next, we remove the insulation from the parts of the copper wire forming the axles. At this point we use the permanent marker to cover with ink the top side of both the left and the right axle. This will insure that current will go through the coil only during half of a full revolution of the coil around the axles. Once the coil-axles assembly is completed we can attach two paper clips at the side of the battery using electric tape, as shown in the figures and clips. It is important that the paper clips can conduct electricity (normal metallic paper clip do) and that they are in contact with the terminals of the battery. We then place the magnet on the battery between the two paper clips and the coil axles in the eyes of the paper clips. Holding in place the battery we then tap the coil and this should start the spinning of the coil.
The students could then experiment using batteries with different voltage, changing the number of windings of the coil, the coil's diamater, the insulating coverage of the axles.
Levitron
| Key facts | |
|---|---|
| Level | 1st Grade and up |
| Conceptual Level | 3th Grade and up |
| Warnings | The base of the levitron has very strong magnets, keep away from electronics and magnetic storage devices. |
| Subject | Magnetism |
| Key concepts | Ferromagnetism, Mechanical Equilibrium |
| Participatory level | Instructor-Only |
| Setup time | 5 minutes |
| Total time | 10 minutes |
| Difficulty | 4 |
| Materials | Levitron set. |
| Note | It is quite difficult at first to get the magnetic top to spin and stay close to the center of the tripod and not being flung to one of the magnets at the basis of the tripod. This is a demonstration for which the instructor has to practice before showing it to an audience. |
| Cost | $33 |
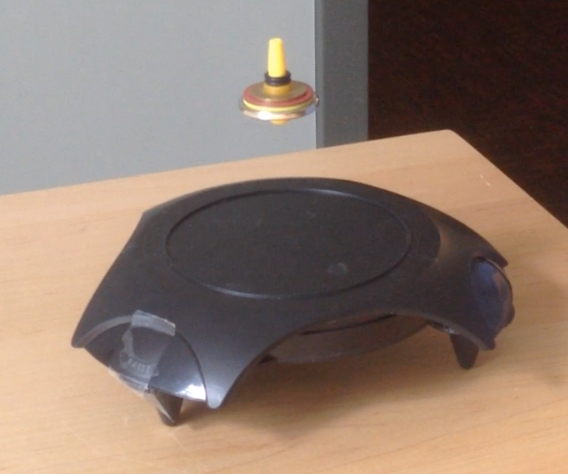
The levitron is another demonstration of the principles of electromagnetism and ferromagnetism. This demonstration well complements the Levitating graphite one.
It is very easy to set up the demonstration. The difficulty is to gain the dexterity to get the magnetic top to spin in place at the center of the basis and to then slowly and carefully lift and remove the transparent plastic on which the spinning top rests to then leave it spinning and floating in mid air. Even after practice it might take quite a few attempts to get it to work and so it is better suited for a patient audience.
As mentioned in the section on the Levitating graphite demonstration a theorem by W. Earnshaw, (W. Earnshaw, "On the nature of the molecular forces that regulate the constitution of the luminferous ether", Trans. Camb. Phil. Soc., 7, 97-112 (1842)), proves that no levitation can be obtained using any combination of fixed magnets and electric charges; [Earnshaw's theorem, on Magnetic Levitation]. In the case of the levitron the theorem is "evaded" by having one of the magnets to spin on itself. Such spinning stabilizes the unstable equilibrium position in which the poles of the spinning top are anti-aligned to the poles of the magnets at the corners of the basis allowing the spinning top to float in mid-air.
Prof. Seth Aubin demonstrating the use of the Levitron.
Bending light with water
| Key facts | |
|---|---|
| Level | 1st Grade and up |
| Conceptual Level | 3th Grade and up |
| Warnings | None. |
| Subject | Optics |
| Key concepts | Refraction, Refractive_index |
| Participatory level | Instructor-Participants |
| Setup time | 15 minutes |
| Total time | 30 minutes |
| Difficulty | 2 |
| Materials | Plastic bottle, laser pointer, support stand, plastic containers to contain spilling water, paper towels. Extra: fiber-optic. |
| Note | The demonstration can also be done without the support stand, in this case it is best to have two students per station so that one can hold the laser pointer while the other one observes the water flowing. It is recommended to collect plastic bottles and make an hole in them ahead of the demonstration. |
| Cost | $30 ($25 without the stand). Keychain laser pointers are a very cheap and effective option ($2.50 each) as laser pointers that can be used. |
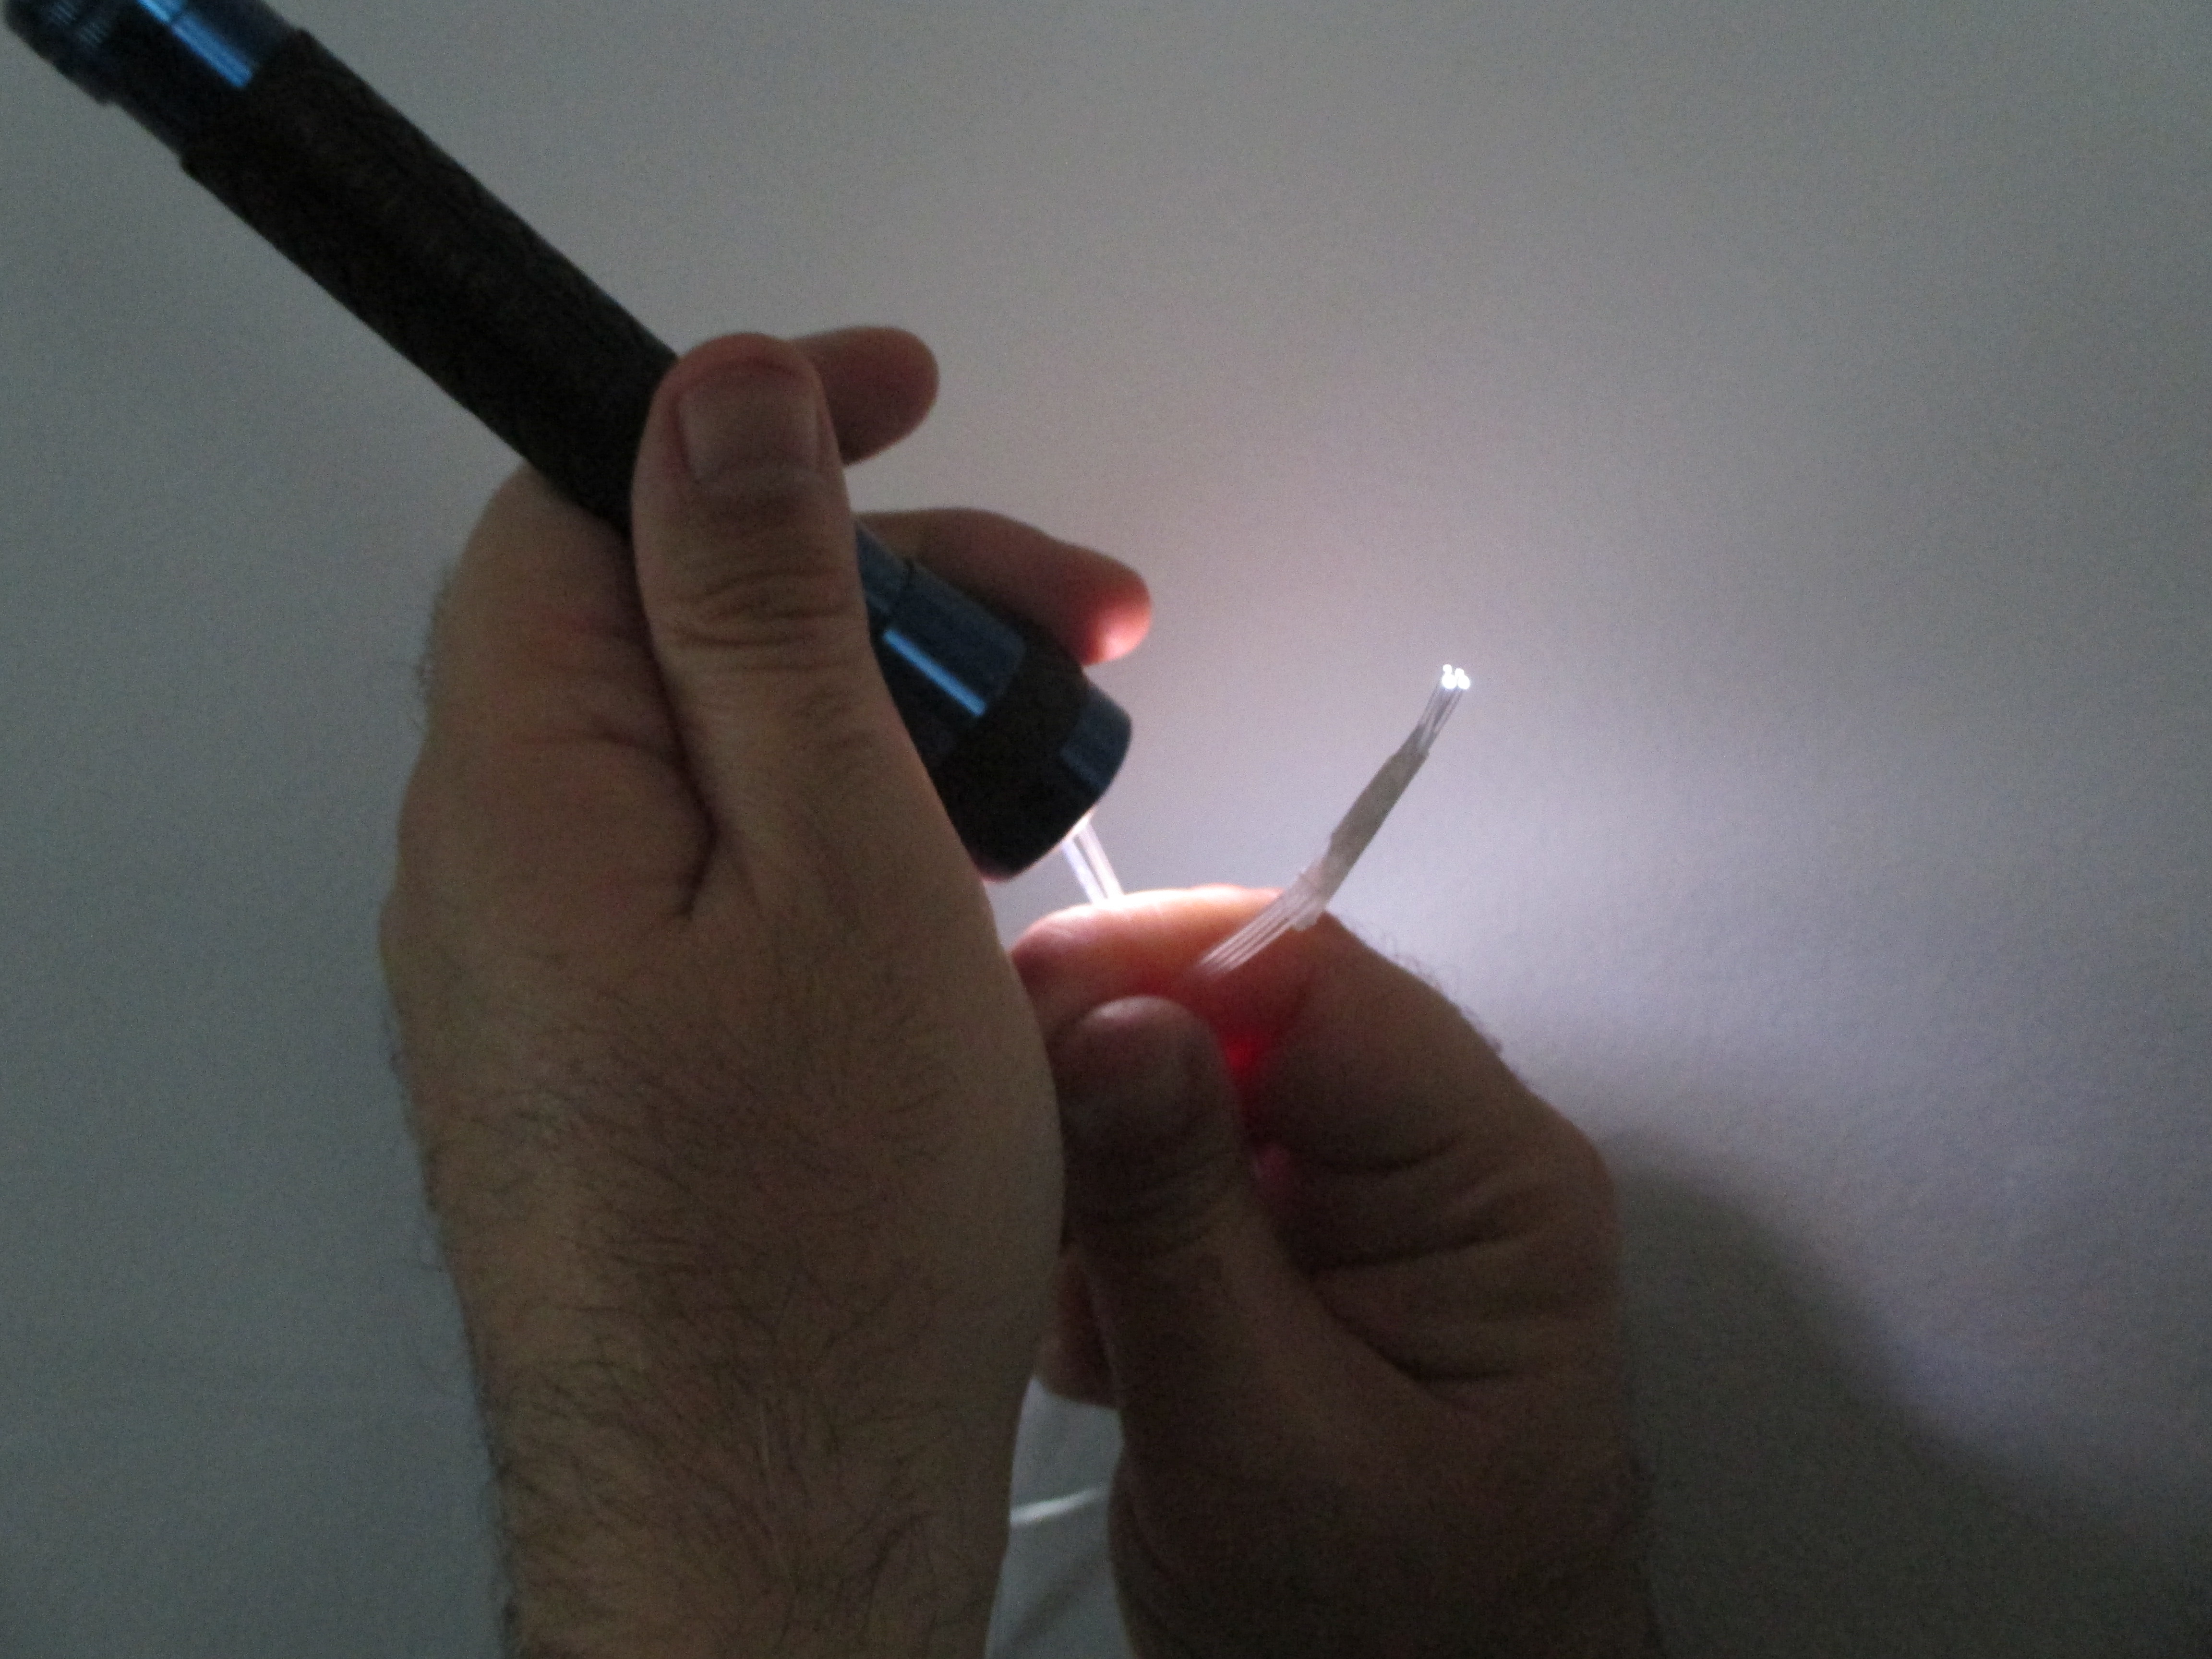
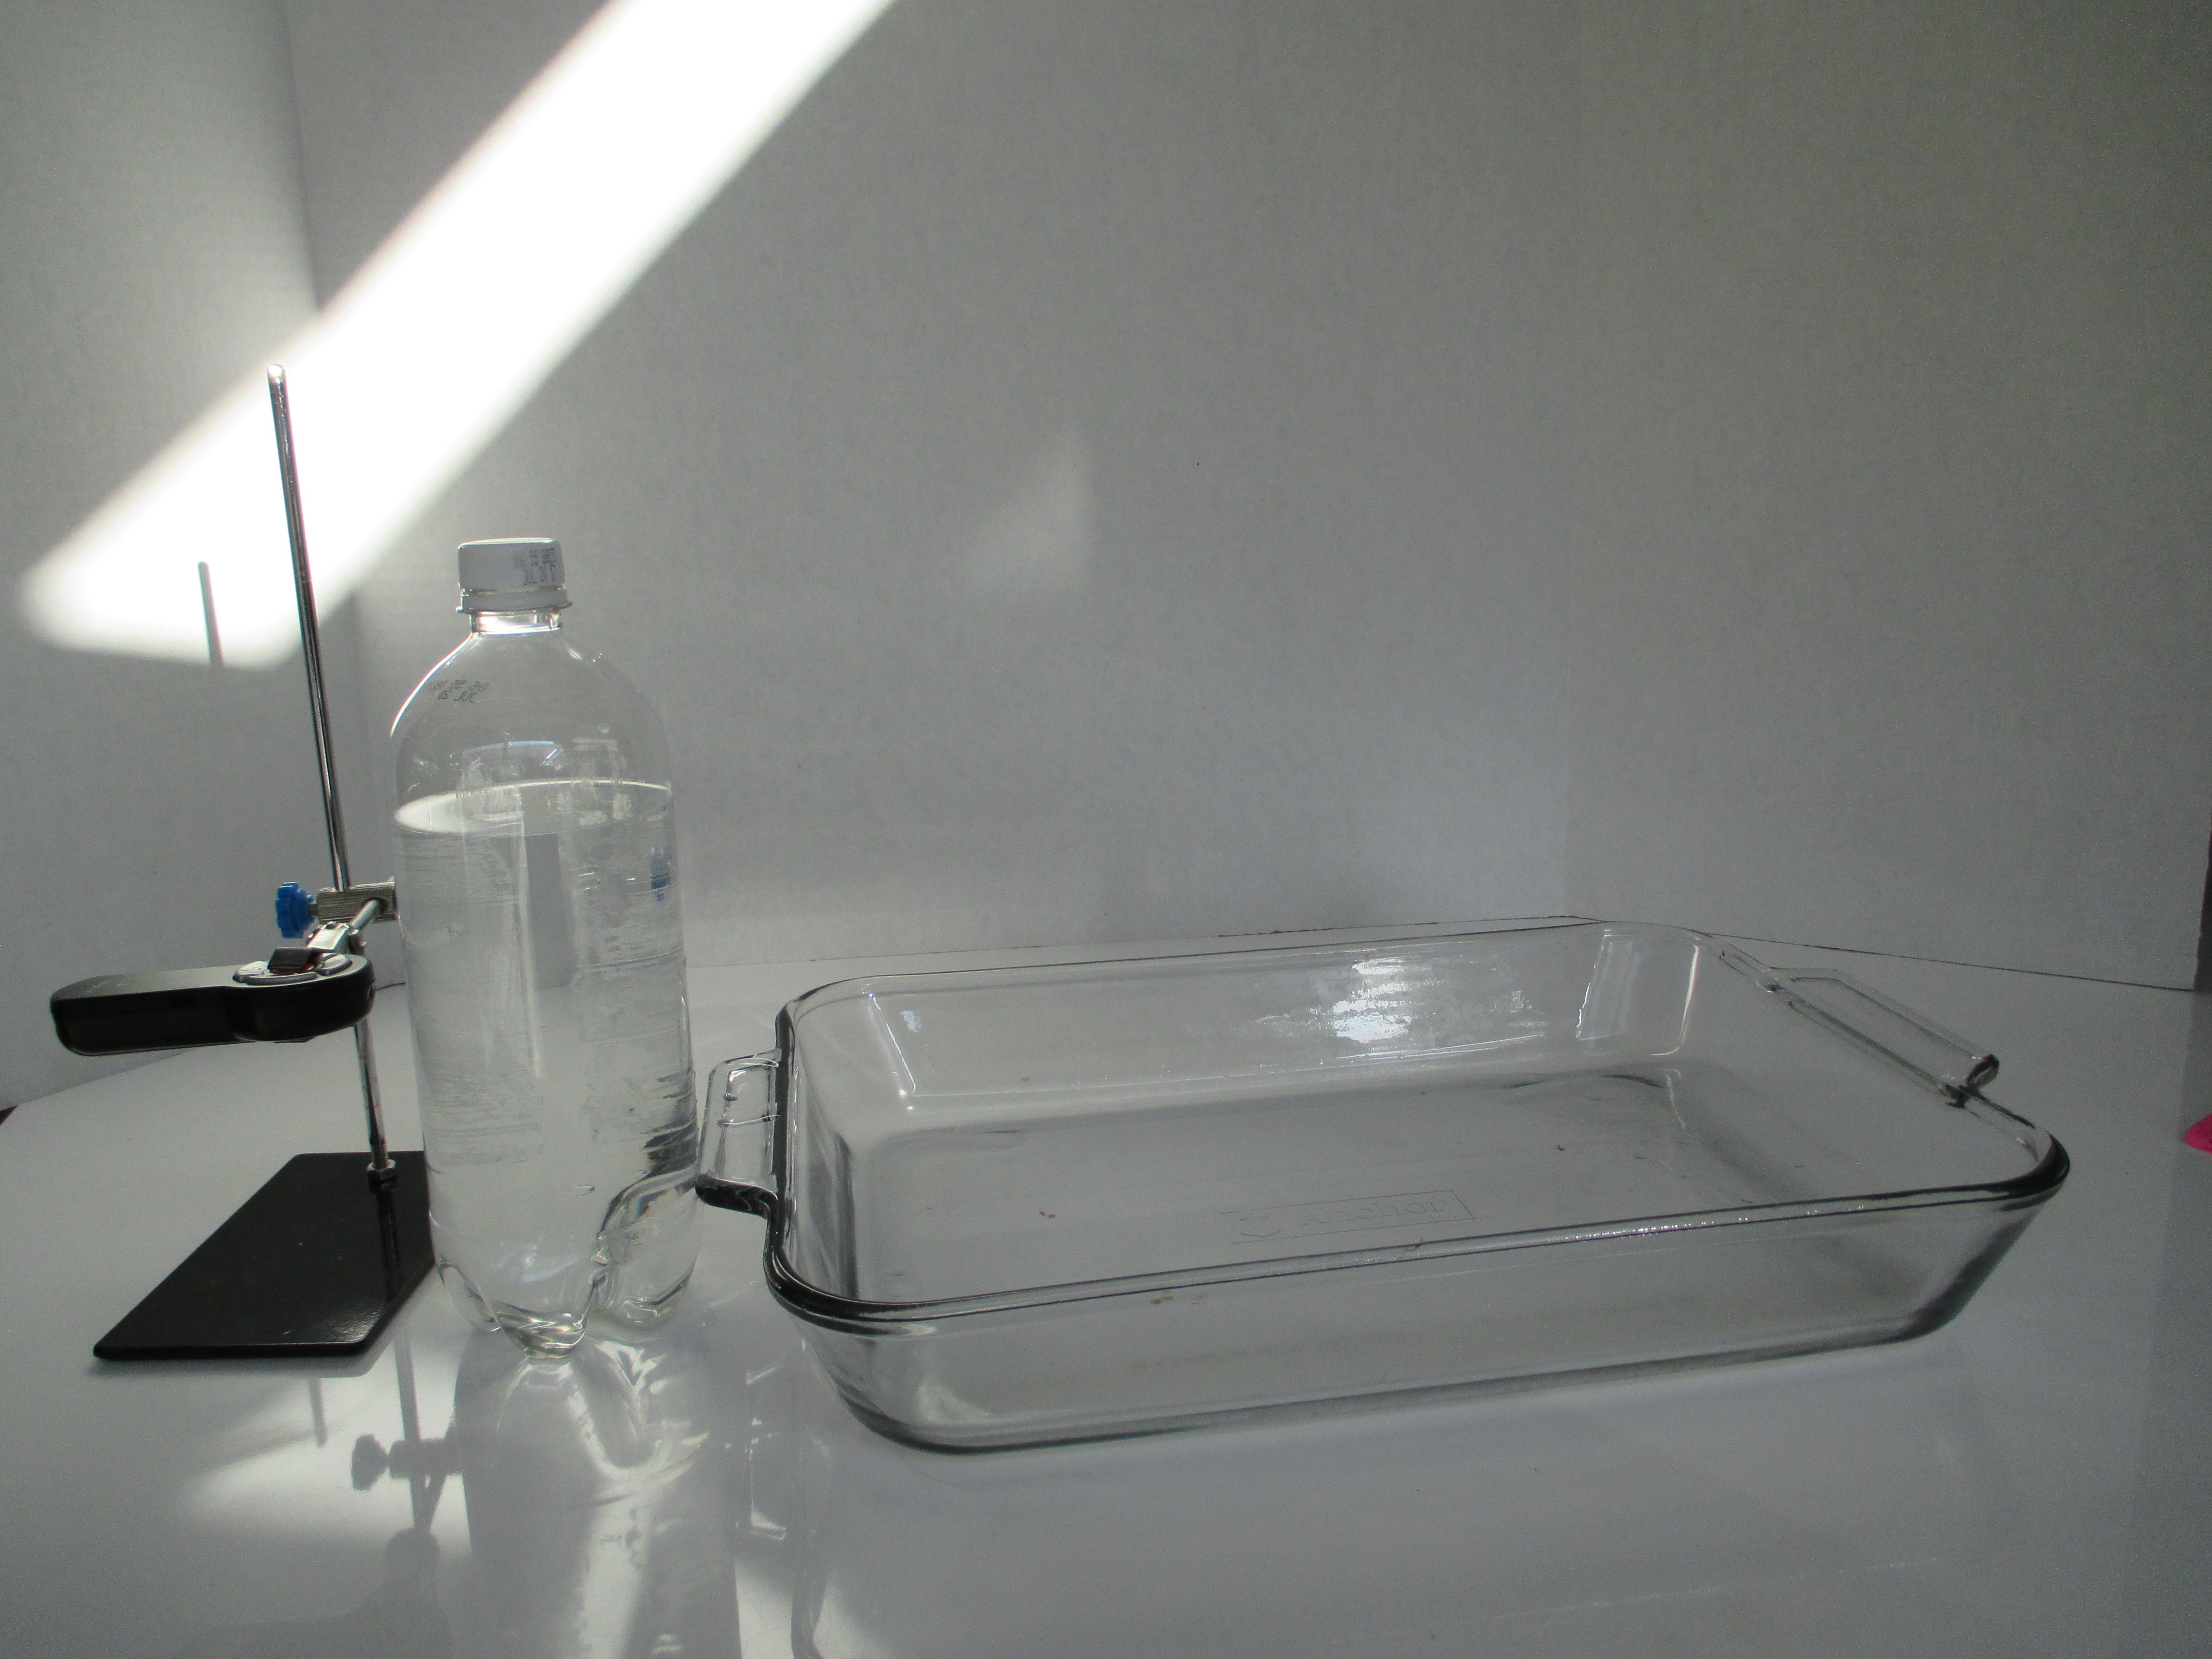
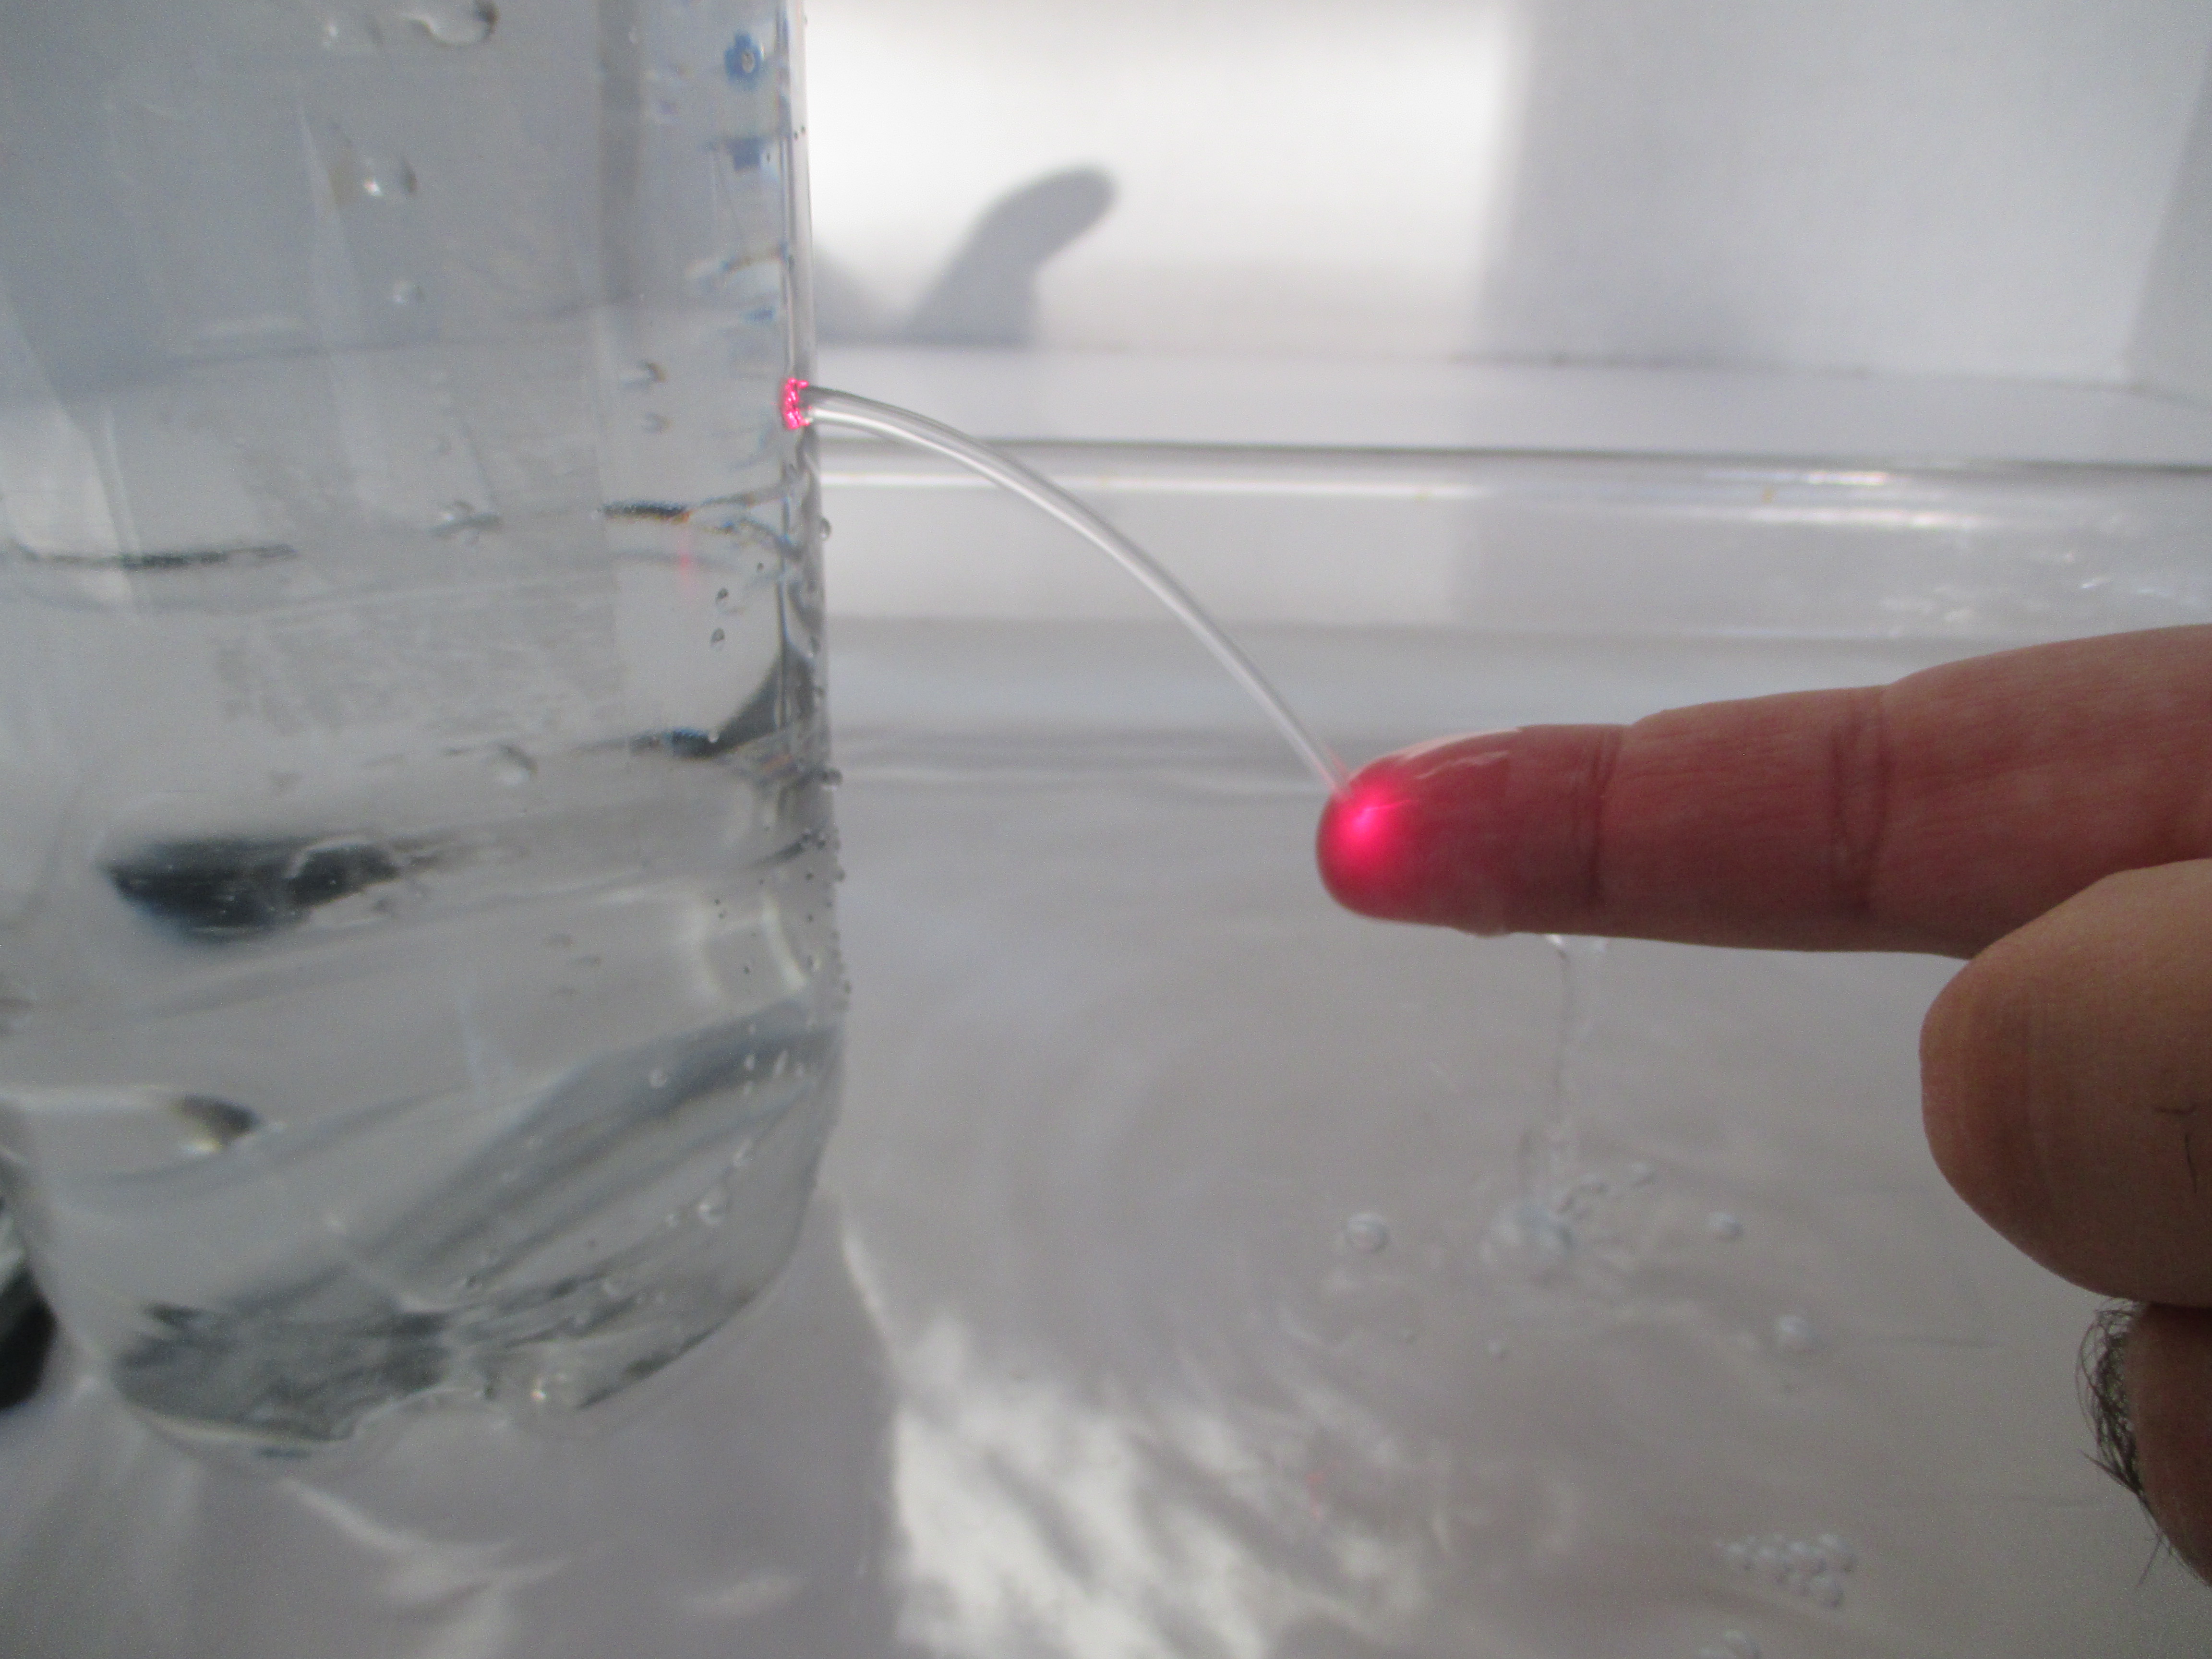
This demonstration is a very simple way to show the principles on which waveguides and fiber-optics work. The instructor can begin the demonstration by showing how a fiber-optic cable can guide the light of a flashlight or laser around corners (see picture above). This motivates the discussion of how the fiber optic can guide light and provides a good segway to move to the main part of the demonstration.
For the main demonstration a transparent plastic bottle with a hole, about 0.5 cm in diameter, is needed. The hole should be a bit below the middle of the bottle and have smooth edges. It can be created easily by using a heated nail tip. The bottle should then be completely filled with water and its top closed with its cap (this will prevent the water to start streaming from the hole). At this point the laser pointer should be positioned close to the bottle behind the hole, making sure that the laser light after crossing the bottle comes out exactly through the hole. Once the laser is in position we can remove the cap: this will allow the water to stream from the hole that we had made at the bottle's midsection. The laser light out of the hole will then be guided, "bended", by the water stream that acts as a waveguide. This can be made evident by placing a finger in the water stream and showing that it is illuminated.
Floating needle
| Key facts | |
|---|---|
| Level | 1st Grade and up |
| Conceptual Level | 1st Grade and up |
| Warnings | Needle sharpness |
| Subject | Fluid mechanics |
| Key concepts | Surface tension |
| Participatory level | Instructor-Participant |
| Setup time | 5 minutes |
| Total time | 15 minutes |
| Difficulty | 1 |
| Materi als | Cups, Water, Cooking Oil, Needles, Paper towels. |
| Note | It is better to use transparent cups so that it is easy to see the floating needle also from the sides. |
| Cost | $1.0 |
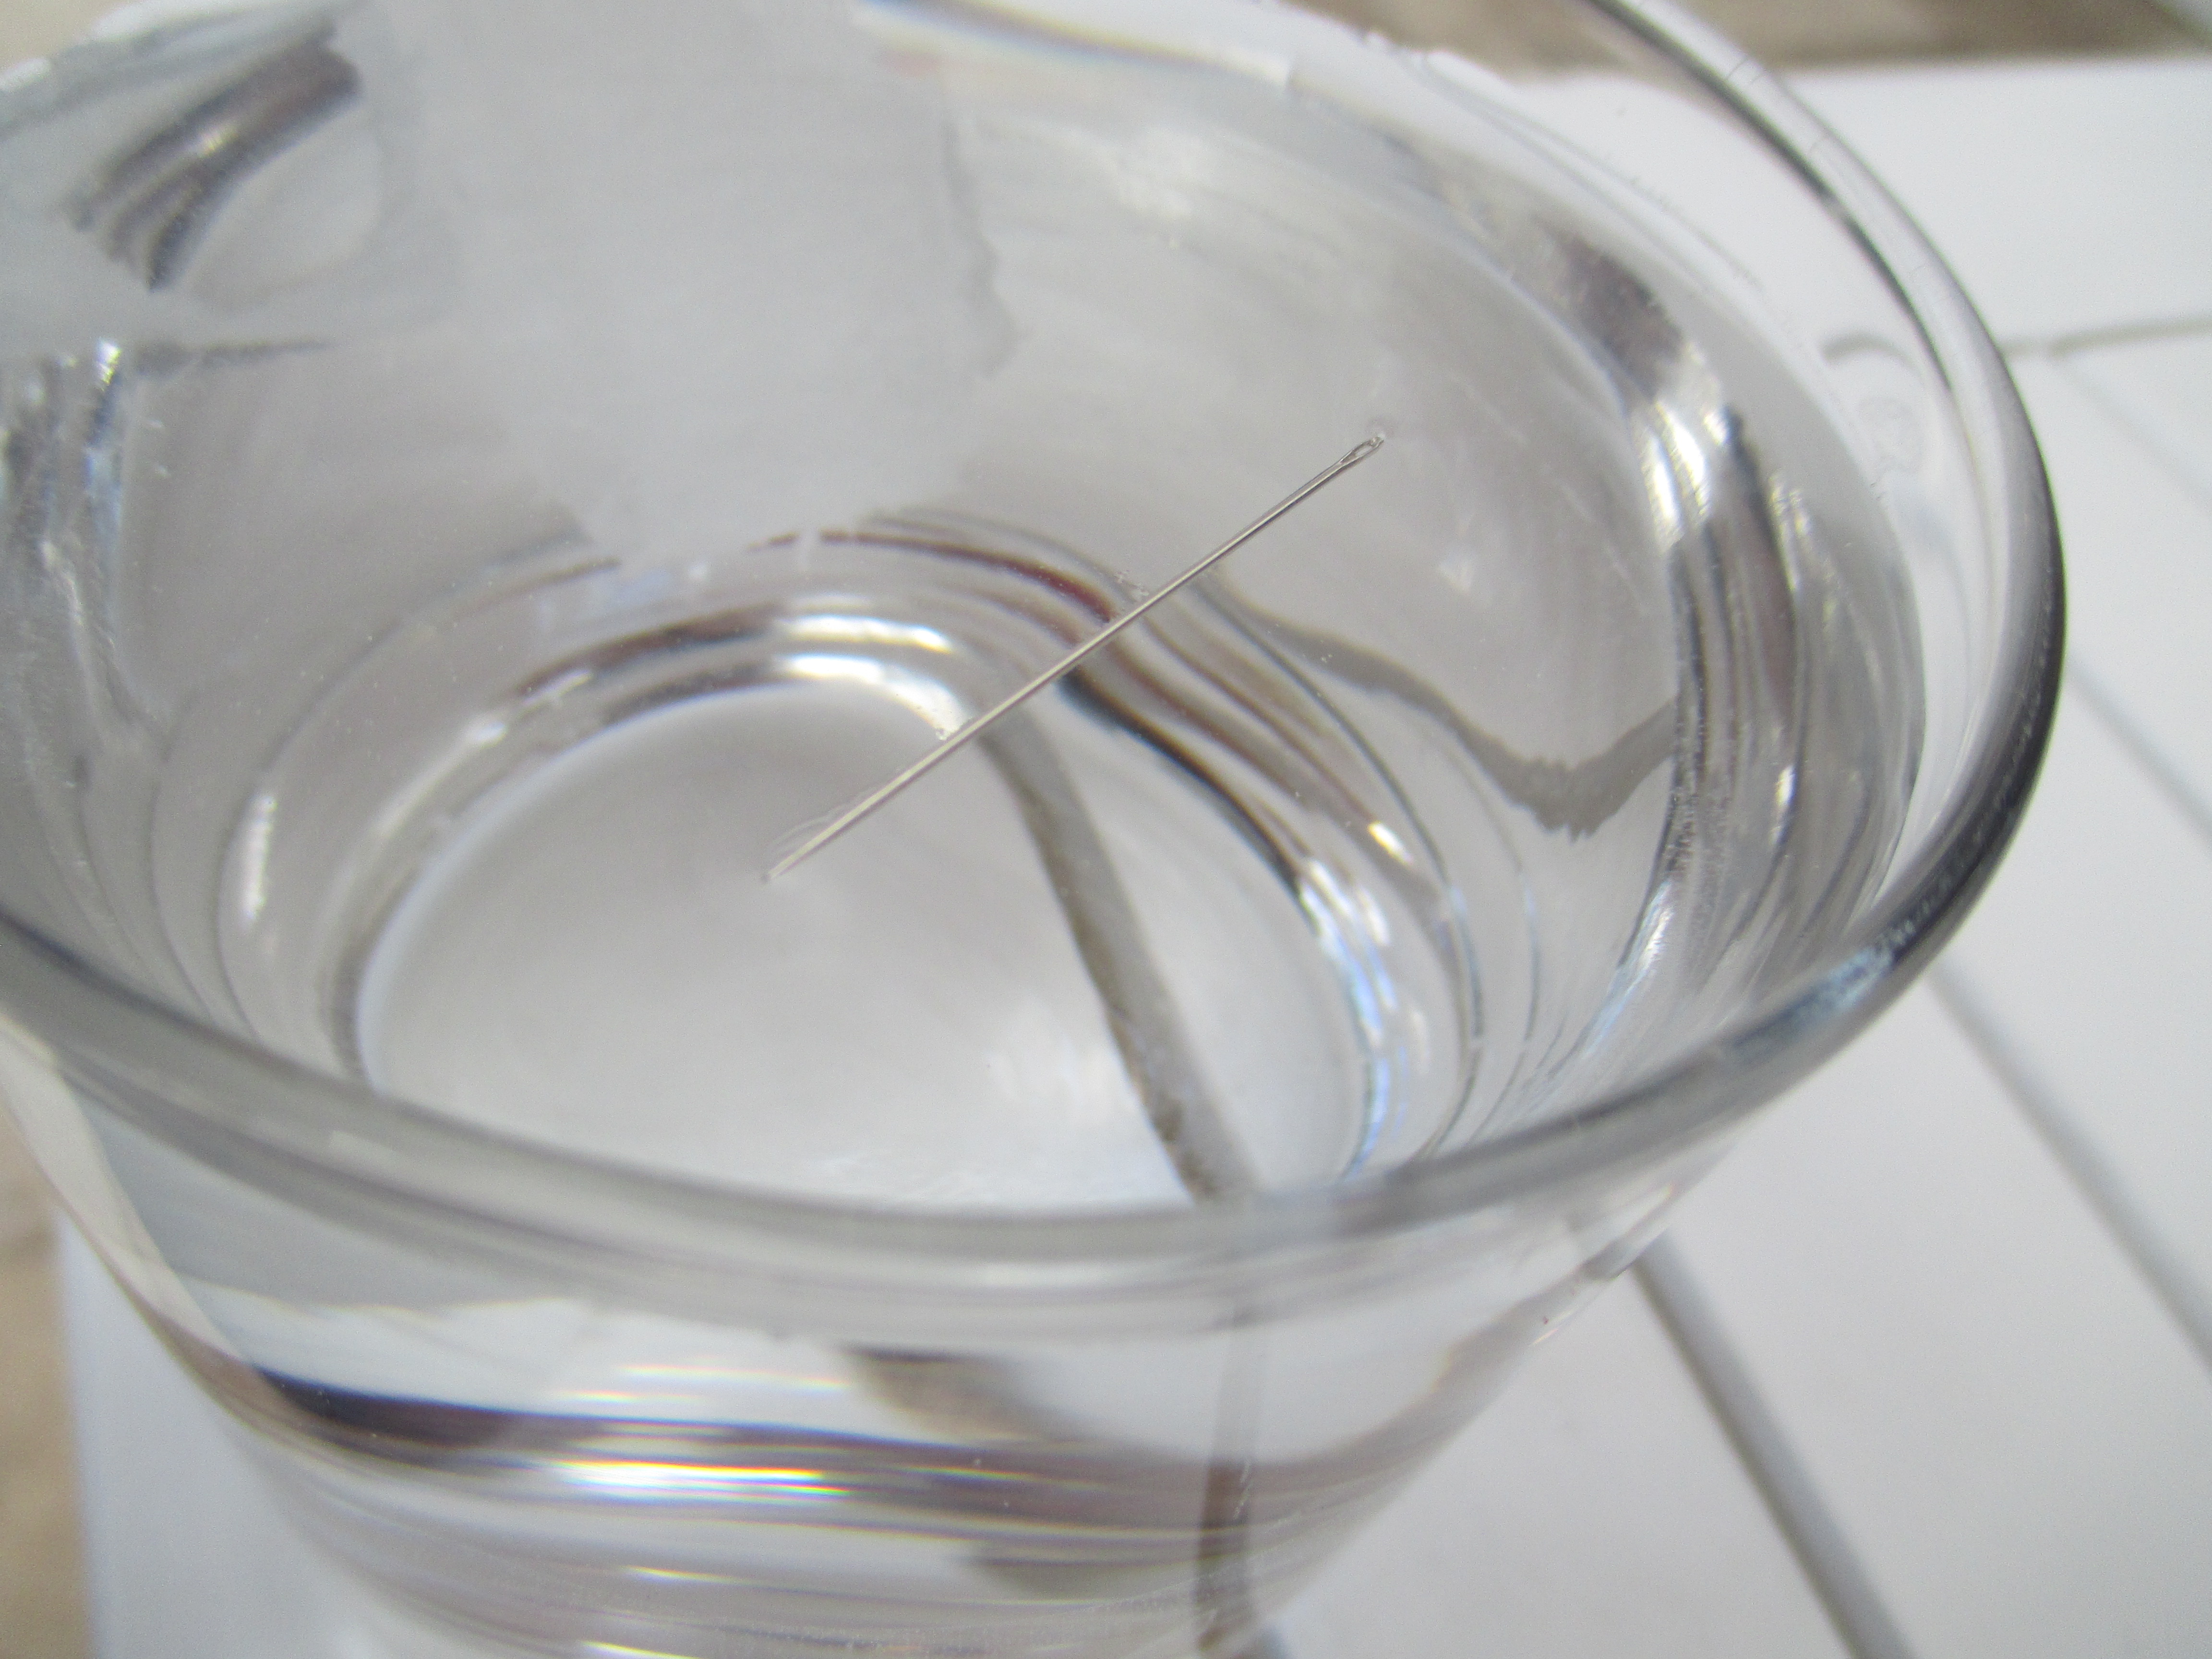
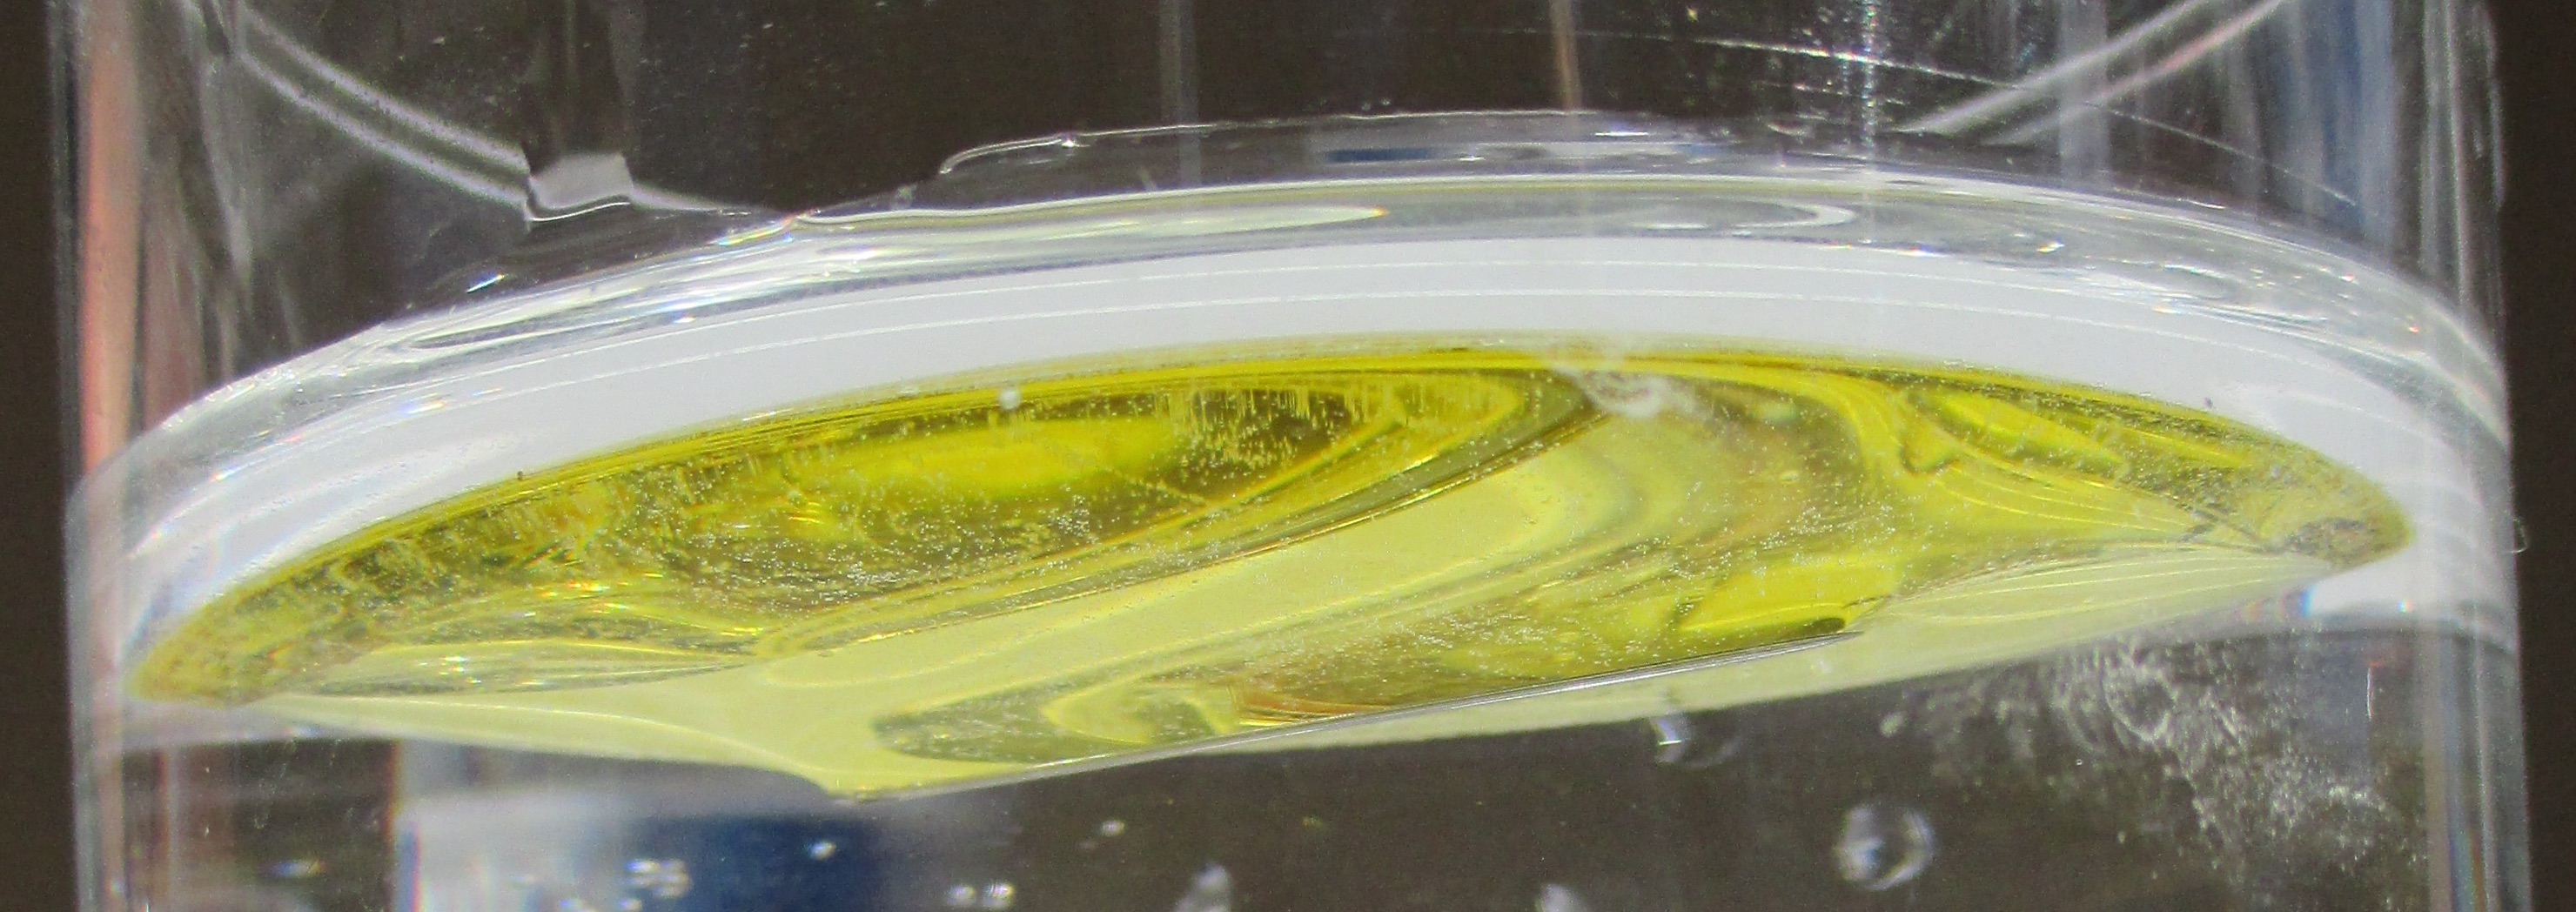
This demonstration is intended to introduce the concept of surface tension of a fluid. After filling the cups with water the students are instructed to place a sewing needle on the water's surface. Without proper care and instructions on how to place the needle, the needle will fall at the bottom of the cup. After this the students are instructed to carefully place a small piece of paper towel on the water surface and then place the needle on it. After few seconds the small piece of paper towel will soak enough water to fall at the bottom of the cup leaving the needle on the surface held in place by the water's surface tension.
The second part of the demonstration consists in pouring some cooking oil on top of the water. Water and oil don't mix, the oil will form a layer on top of the water. We then gently place the needle on the surface of the oil. The needle will easily drop through the oil, however, most of the times, it will not fall trhough the water. The resaon is that the viscosity of the oil slows the needle enough to place it gently on the water surface where it is held in place by the water's surface tension. This part of the demonstration also shows the oil has a lower surface tension than water. The oil layer on top of the water also allows to clearly see the bending of the water surface caused by the needle when looking at the glass from the side (see picture above).
Non-Newtonian fluid
| Key facts | |
|---|---|
| Level | 1st Grade and up |
| Conceptual Level | 1st Grade and up |
| Warnings | None |
| Subject | Fluid mechanics |
| Key concepts | Non-Newtonian Fluid |
| Participatory level | Instructor-Participant |
| Setup time | 10 minutes |
| Total time | 15 minutes |
| Difficulty | 1 |
| Materials | Mixing bowls, mixing spoons, corn starch, water |
| Note | |
| Cost | $3.0 |
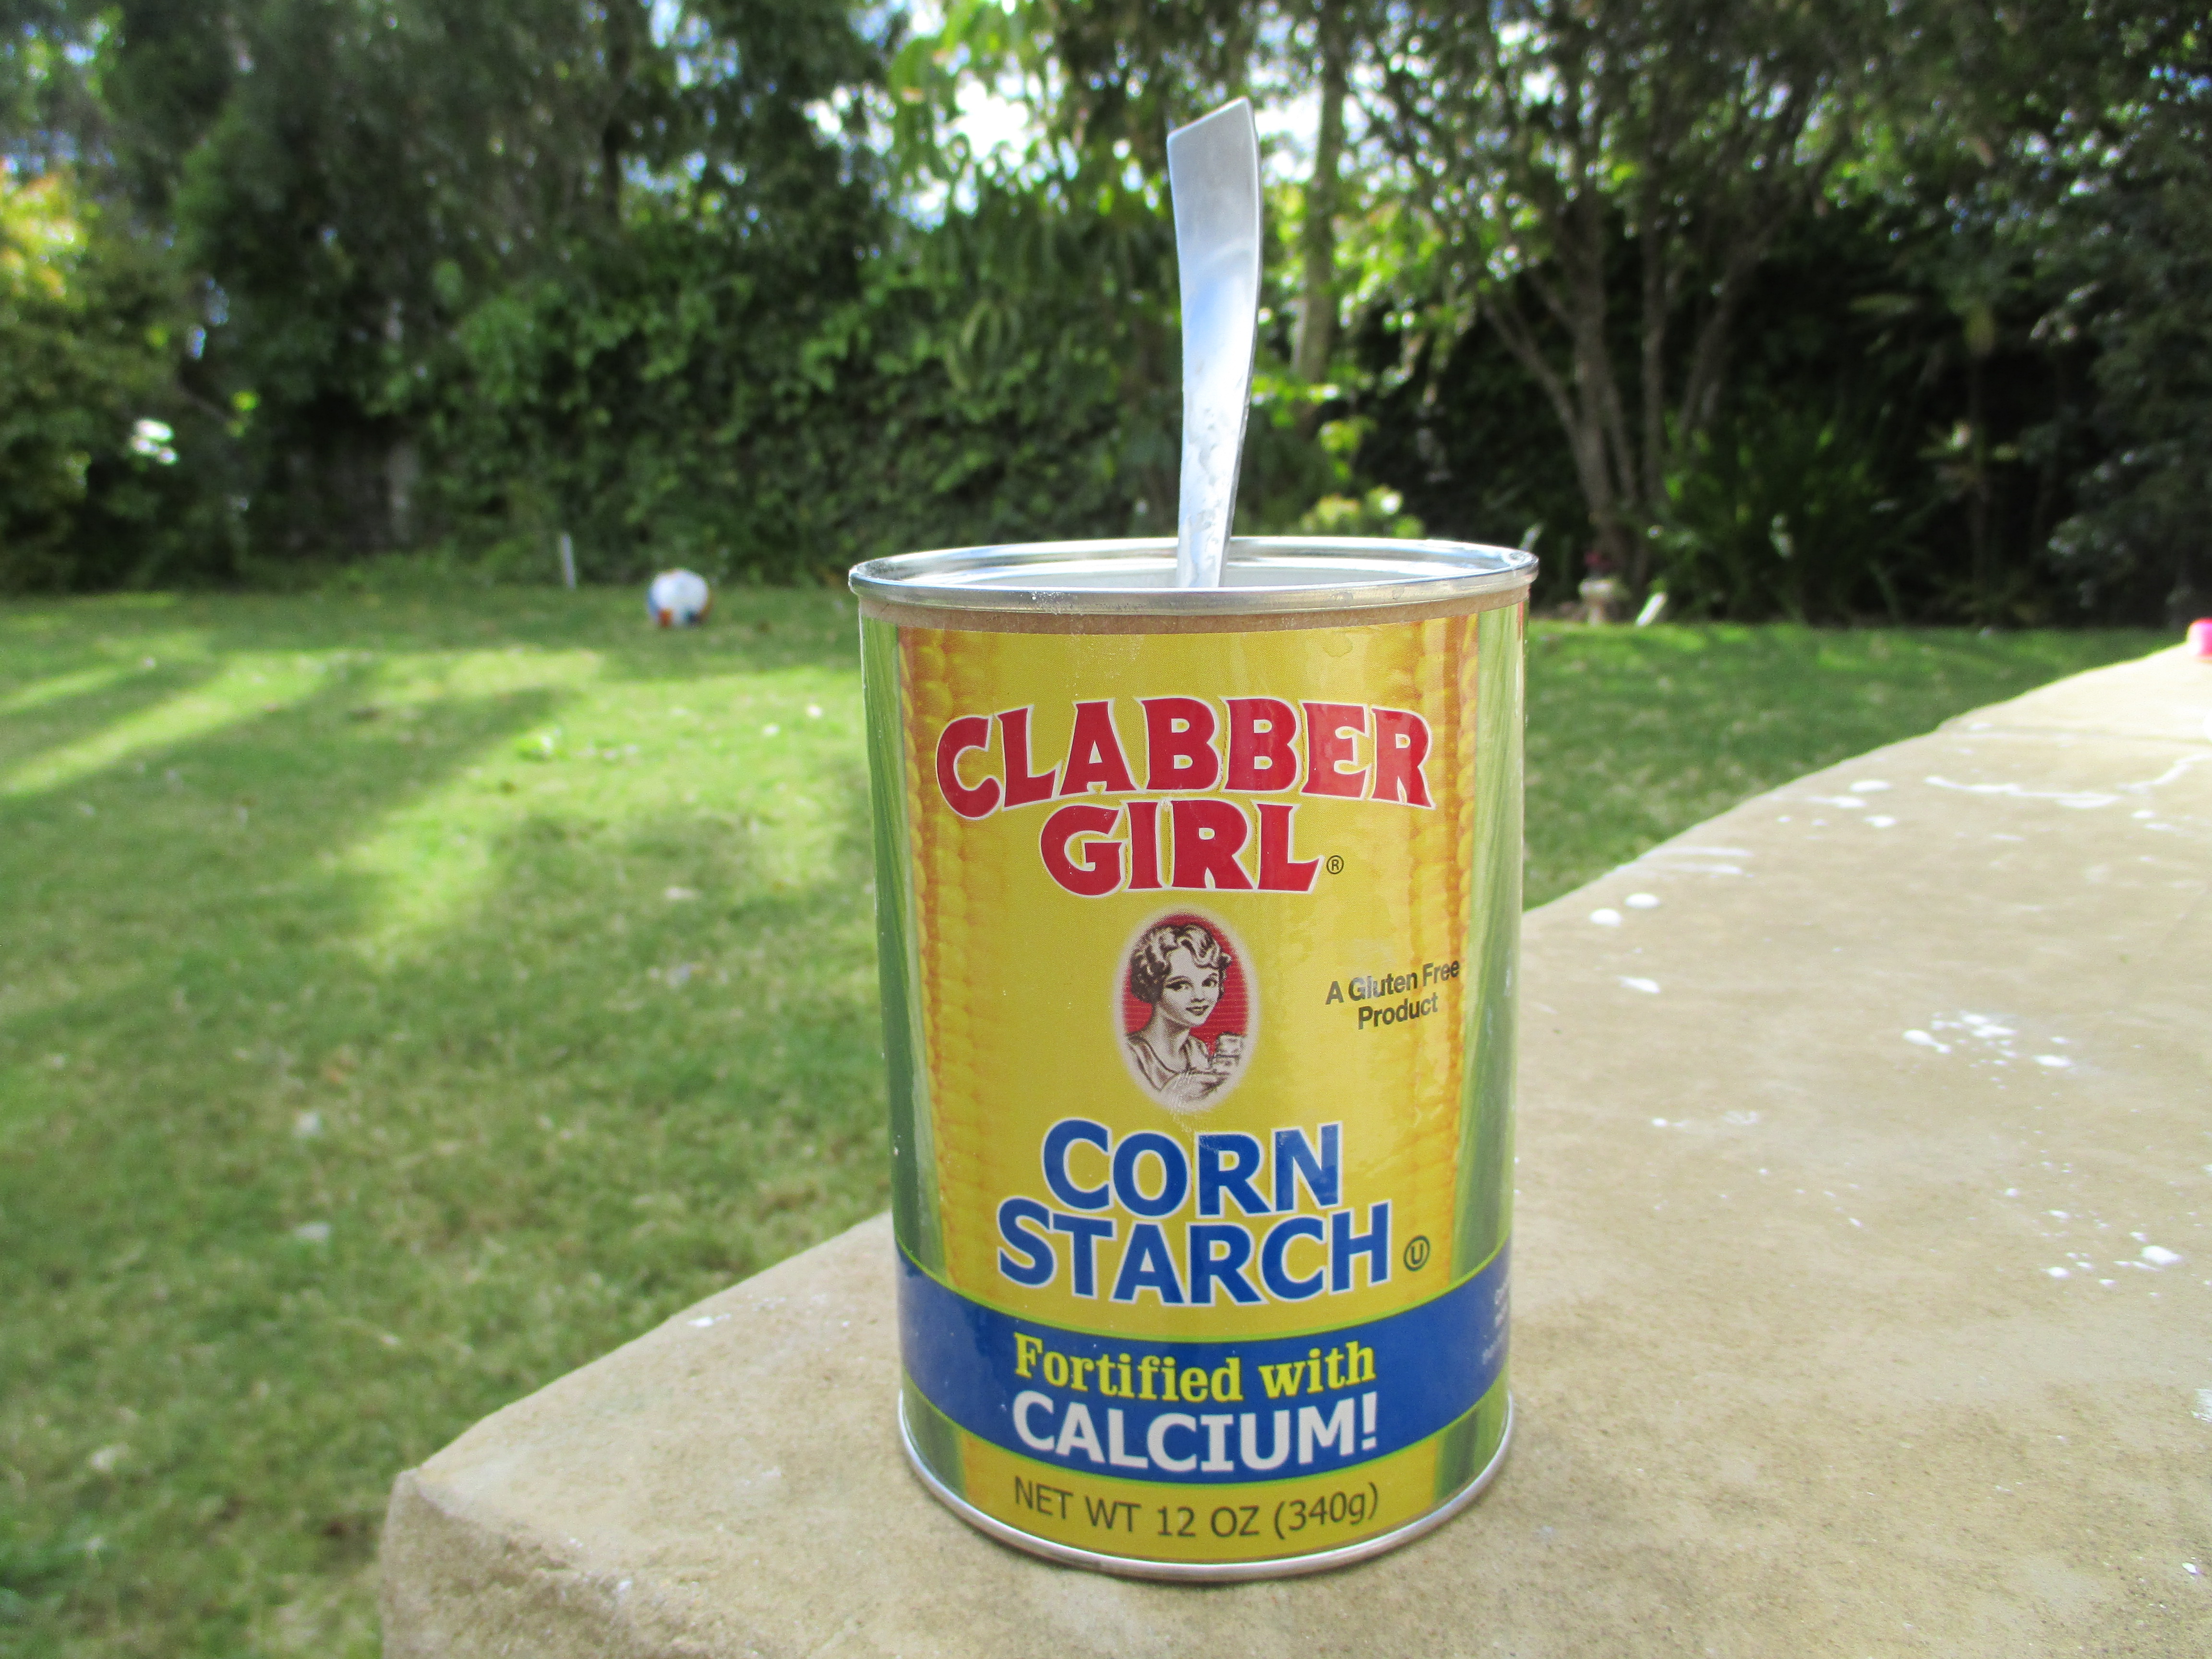
This demonstration is intended to explain the difference between Newtnonian fluids, for which the viscosity only depends on the temperature, and non-Newtonian fluids for wich the viscosity depends also on other parameters such the pressure. It can be a good idea to pair this demonstration with the "Floating needle" one to explain the different mechanisms that explain the resistance that fluids exert on entering objects.
In this demonstration corn starch is mixed with water until the amalgamate is hard to mix. At this point the mix should behave almost as a solid when poked quickly with fingers and like a very stick liquid when poked slowly. This behavior is exemplified in the two videos below that show how a hard ball falls into the mix when dropped but bounces off the mix' surface when trown fast.
Soap driven boats
| Key facts | |
|---|---|
| Level | 1st Grade and up |
| Conceptual Level | 1st Grade and up |
| Warnings | None |
| Subject | Fluid mechanics |
| Key concepts | Surface tension |
| Participatory level | Instructor-Participant |
| Setup time | 5 minutes |
| Total time | 10 minutes |
| Difficulty | 1 |
| Materials | Construction paper, large plastic container, dish-soap |
| Note | |
| Cost | $1.0 |
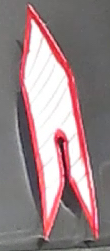
This demonstration is intended to show how the surface tension of a liquid can be disrupted by a surfactant. The concept of surface tension can be introduced using the "Floating needle" demonstration.
The first step to set-up this demonstration is to cut out from construction paper card boats in a form of an arrow. The rear of the arrow should be shaped as a funnel as shown in the figure above. After placing the "arrow" in the water a drop of dish soap should be put at the tip of the "funnel" on the arrow's rear. The dish soap lowers the surface tension that binds the water molecules at the surface allowing them to expand and so propel the card-boat forward.
Tippe top
| Key facts | |
|---|---|
| Level | Any age |
| Conceptual Level | 3th Grade and up |
| Warnings | None. |
| Subject | Classical mechanics |
| Key concepts | Angular Momentum, Friction |
| Participatory level | Instructor-Participant |
| Setup time | 1 minute |
| Total time | 5 minutes |
| Difficulty | 1 |
| Materials | Tippe tops. |
| Note | Wood tippe tops often flip in a shorter amount of time than metal ones. |
| Cost | $2 |
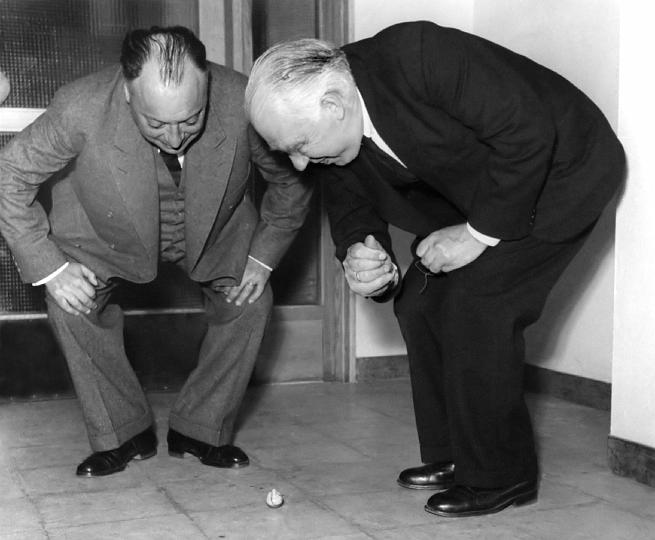
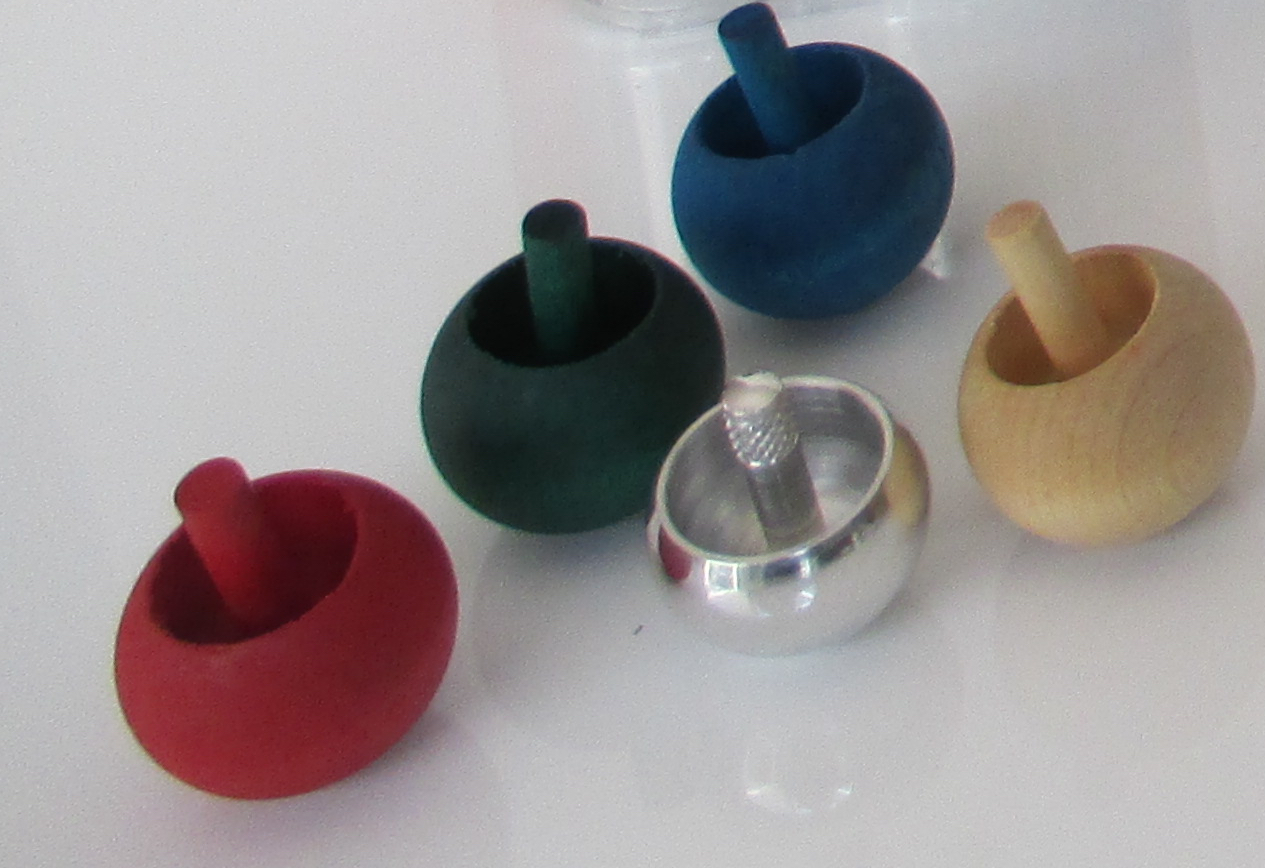
The Tippe top (or flip top) is a classical and easy demonstration whose full explanation has been fascinating physicist for a long time.
To execute the demonstration we simply have to spin the top. Due to the friction between the bottom of the top and the surface on which it spins, the top will start precessing with increasing precession angle until it flips and then continues to spin "upside-down". Because friction is needed to get the top to flip often wooden tippe tops flip in a shorter amount of time than metal ones. It is nice, if possible, to let the people in the audience keep the tippe top as a memento.
A full description of the mechanism behind the flipping of the top is complicated (F.F. Johnson, American Journal of Physics 28, 406 (1960)). The basic idea is that the conservation of the angular momentum, combined with the friction force that exerts a torque on the top, conspire to progressively increase the precession angle until the top completely flips.
Many thanks to Seth Aubin, Todd Averett, Wouter Deconinck, Josh Erlich, Xiang Hu, and Irina Novikova for help and suggestions.
Work supported by

Physics Department